1 Terms
| Terms | Explanation |
|---|---|
| GDMC | Global Digital Marketing Center, i.e. the "system" referred to in this document. |
| IDMS | International Dealer Management System |
2 Role Clarification
| Role Name | Explanation |
|---|---|
| GDMC Claim specialist | Personnel operating claims business in GDMC, to review the warranty claims application from dealers, to transfer them to the IDMS system for international claim business, to settlement and to audit the claims |
3 Master Data Management
Business Background: There are many master data in this module including Dealer information, labor time operation, material information, fault parts management, craft route management, fault position library, fault phenomenon library, fault reason library, fault position-phenomenon library and fault position-reason library. Dealer information mainly collects all Dealer’s data such as code, name, currency, etc. GDMC uses these data to maintain the information for warranty claims.
3.1 Dealer information
Path: GDMC system – Warranty Management – Warranty Master Data

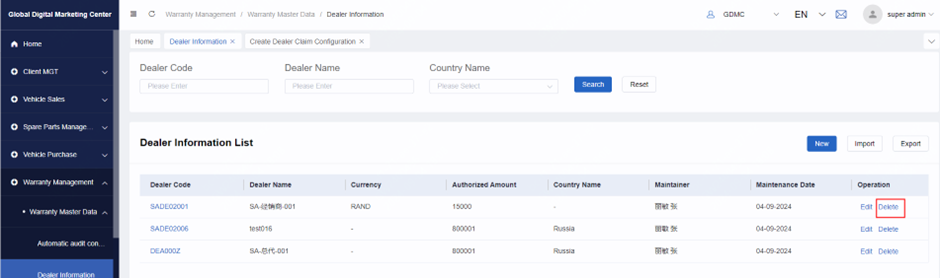
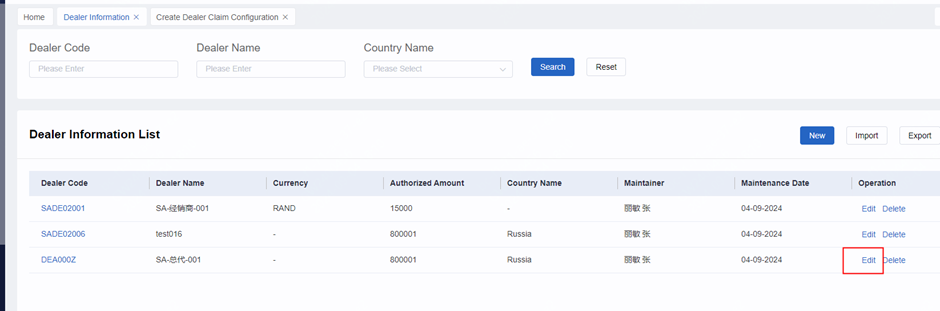
1) Search for the corresponding master configuration by condition
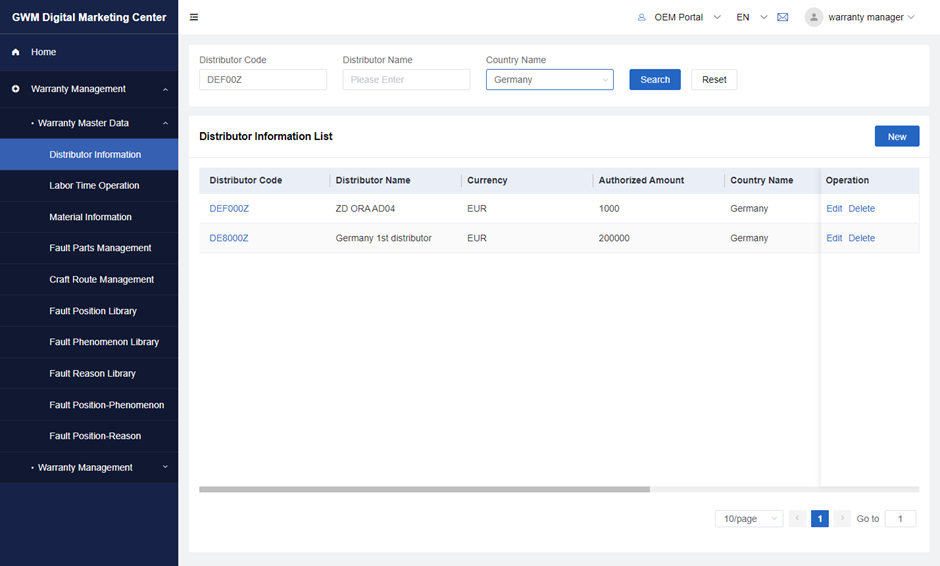
2) Edit/Remove Dealer Configuration
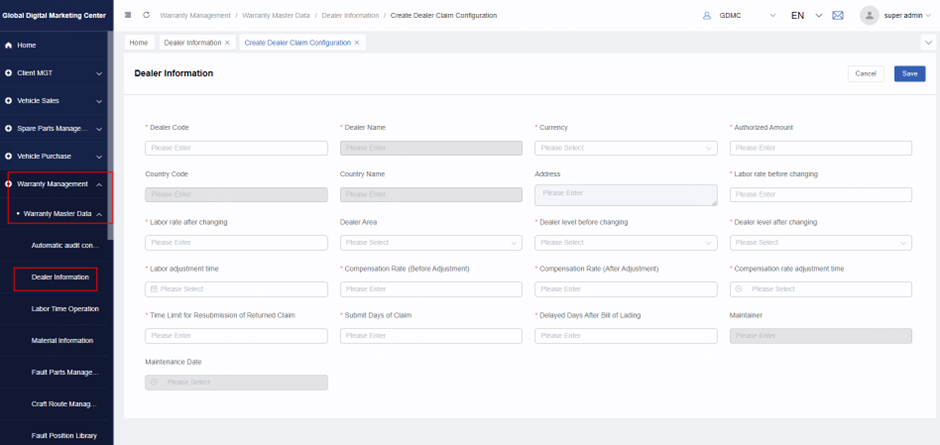
3)1) Create a new Dealer Claims Configuration (same as edit page)
Note: You can click the Save button after filling out the claim configuration form for this Dealer, and the saved information will be entered into the Dealer configuration list. Also, you can cancel this new operation and go back to the list page.
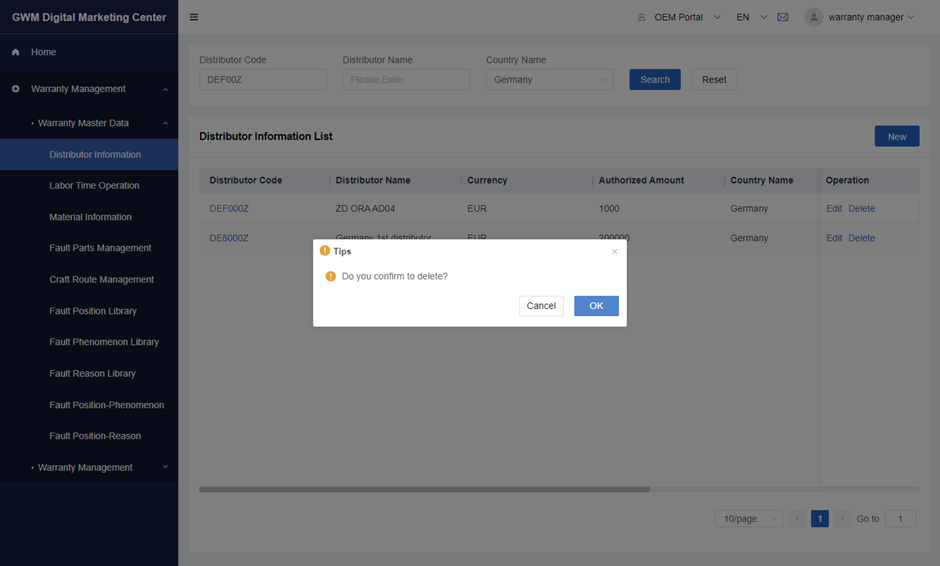
You can also delete dealer’s warranty configuration information by clicking on delete. But the precondition is that there are no claims records of this dealer.
After dealer’s warranty configuration created, you can edit it
Meanings of some fields:
| 1 | Authorized Amount | To set the amount when dealer need to file a technical report, if you set it 15000 then if the claim amount exceeds 15000 rand then dealer need to file technical reports if the claim amount exceeds 15000rands. |
|---|---|---|
| 2 | Labor rate before changing | Dealer’s labor rate may change, here you can set a rate before changing like 1000 rand per hour. |
| 3 | Labor rate after changing | Here you can set a rate after changing, when dealer file a claim after labor rate changing date, the labor cost will be calculated by this rate. |
| 4 | Time limit for resbmitssion of returned claim | If the warranty specialist returns dealer’s claim, dealer can modify it and resubmit it, but if dealer resubmit it exceeds the day set here after it returned, the claim cannot be submit again. |
| 5 | Submit days of claim | If you set a number here like 7,then if dealer submit a claim exceeds 7 days after repair finished, dealer will not allowed to submit it. |
| 6 | Delayed days after bill of lading | This will be used to calculate the warranty start date, warranty start date=min(sale date, shipping date+delayed days after bill of lading) |
3.2 Labor time operation
Note: Labor time is the standard time required to repair an item, which is a key basis for warranty claims, and it will be synchronized from IDMS ( the Headquarters’ system)
1) Search by condition for the corresponding Labor time master data
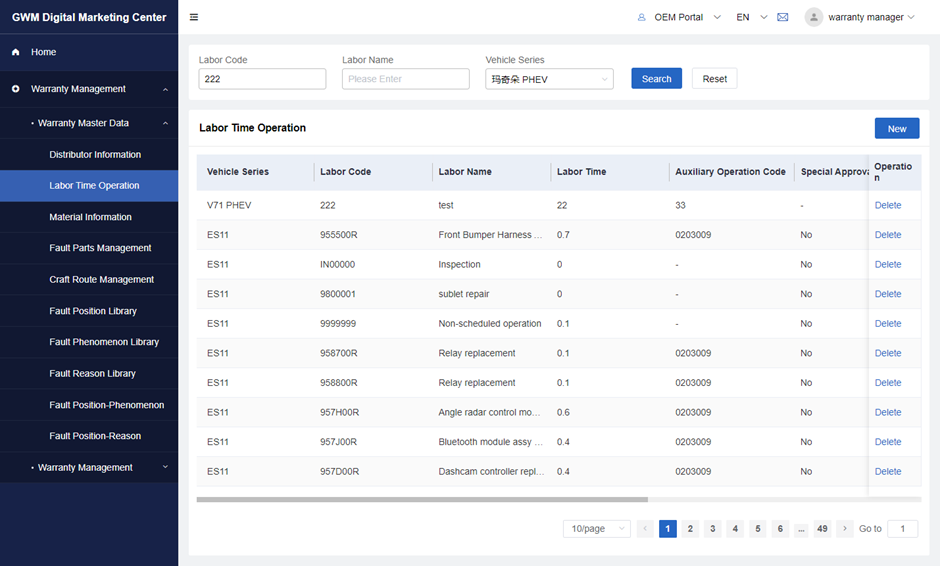
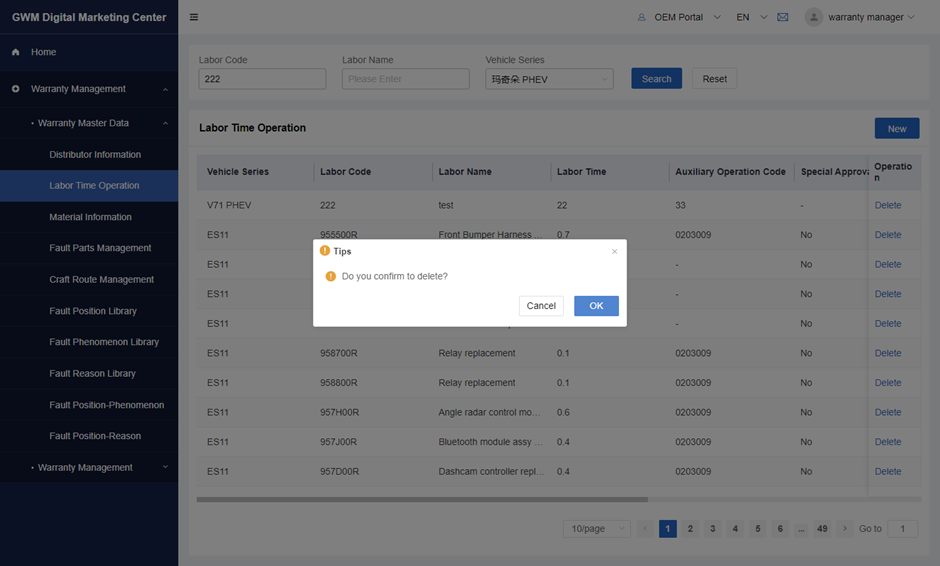
2)Delete Labor time master data
In the list view, you can see one labor code’s details and delete it.
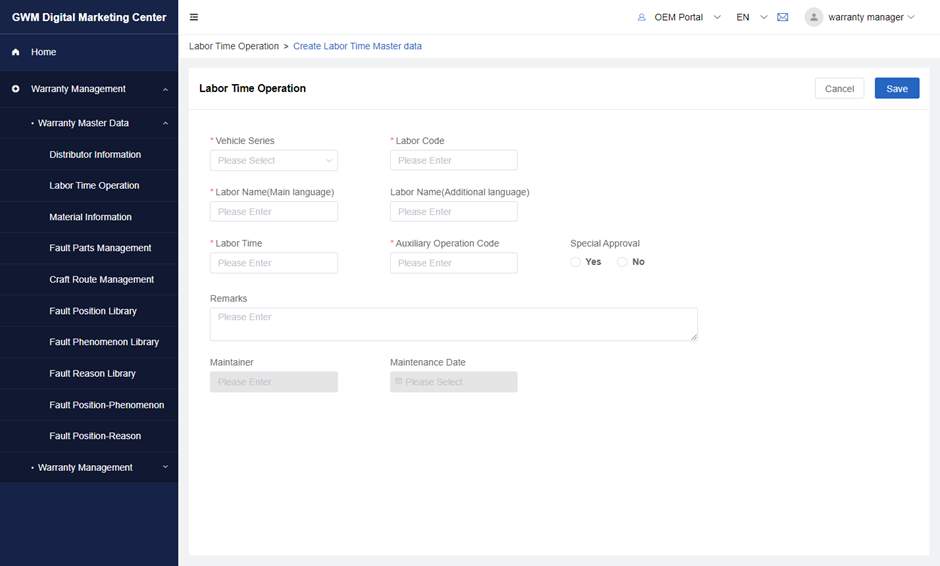
3)Create new labor time master data
Note: You can click the Save button after filling in the master data form, and the saved information will be entered into the master data list. Also, you can cancel this new operation and go back to the list page
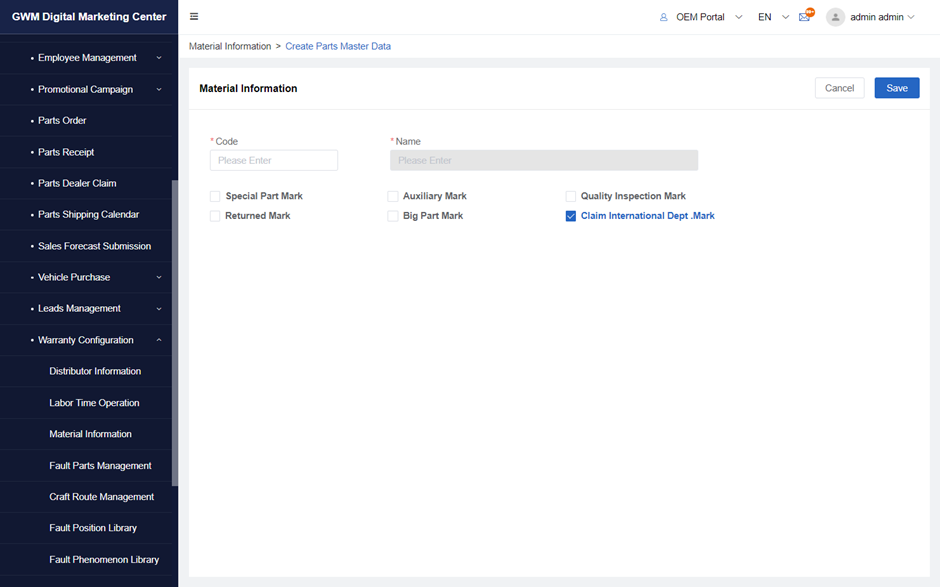
3.3 Material information
1)Search and delete function is same as labor time information
2)Create new material information
Note: After filling out the material information form, you can click the Save button, and [1] the saved information will be entered into the material information list. Also, you can cancel this new operation and go back to the list page. Currently, the material data is from OTD accessories and prices, later may involve different countries using different material prices.
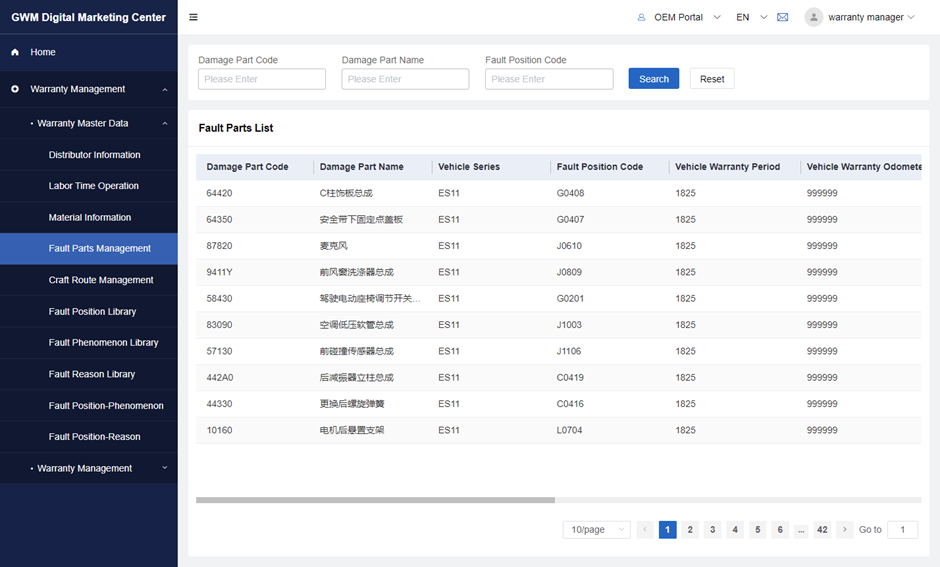
3.4 Fault parts management
1)Note: GDMC specialists can search for eligible fault parts based on fault parts number, fault parts name and fault parts code.
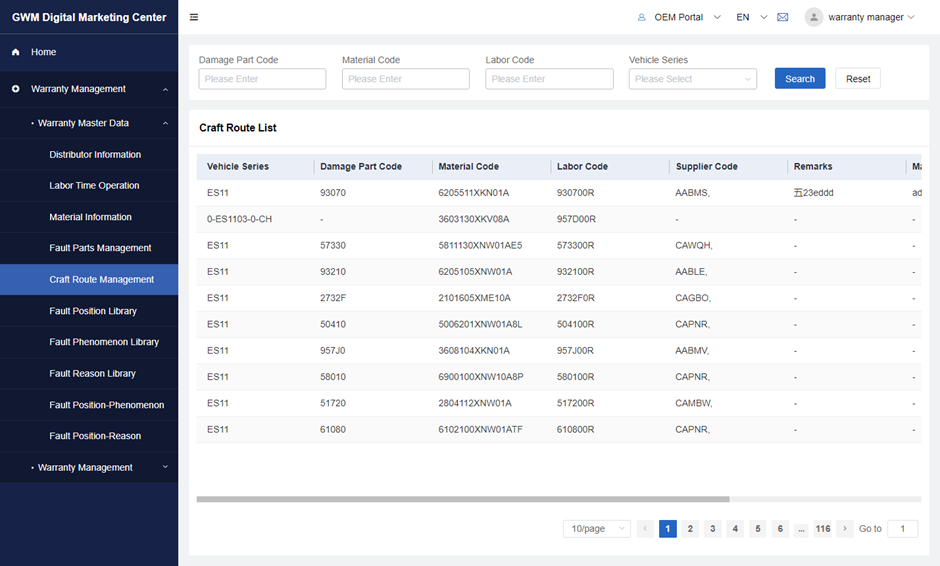
3.5 Craft route management
1)Note: The craft route is a criterion in order to check the correctness of data such as fault parts, parts code, suppliers, and labors in the claim form, and it represents the correspondence between several key items above. GDMC specialists can search for eligible craft routes by fault part code, material code, labor code, and series.
3.6 Fault position library
1)Note: GDMC specialists can search the eligible fault position according to the fault position code, the fault position name, and the system

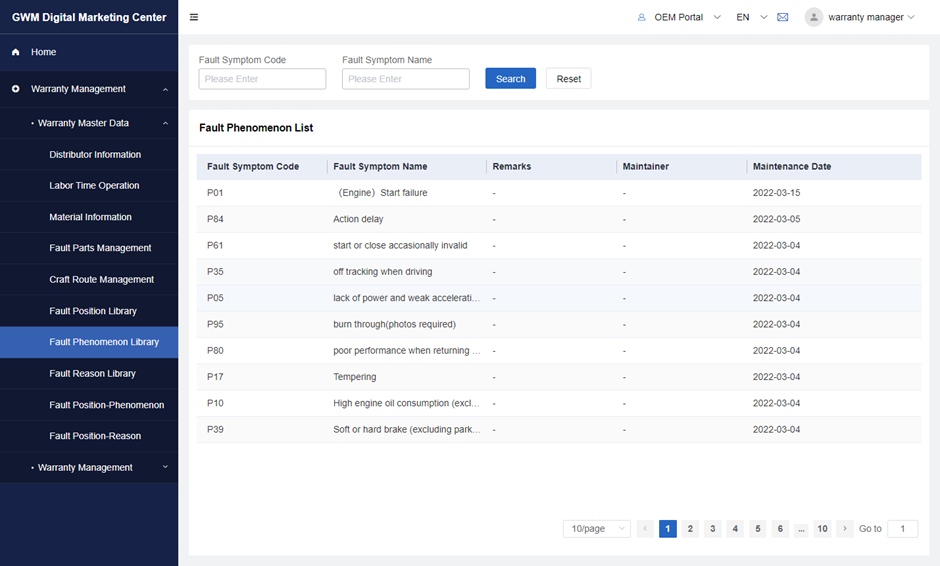
3.7 Fault phenomenon library
1)Note: GDMC specialists can search for eligible fault phenomena according to the fault phenomena code and the name of the fault phenomena
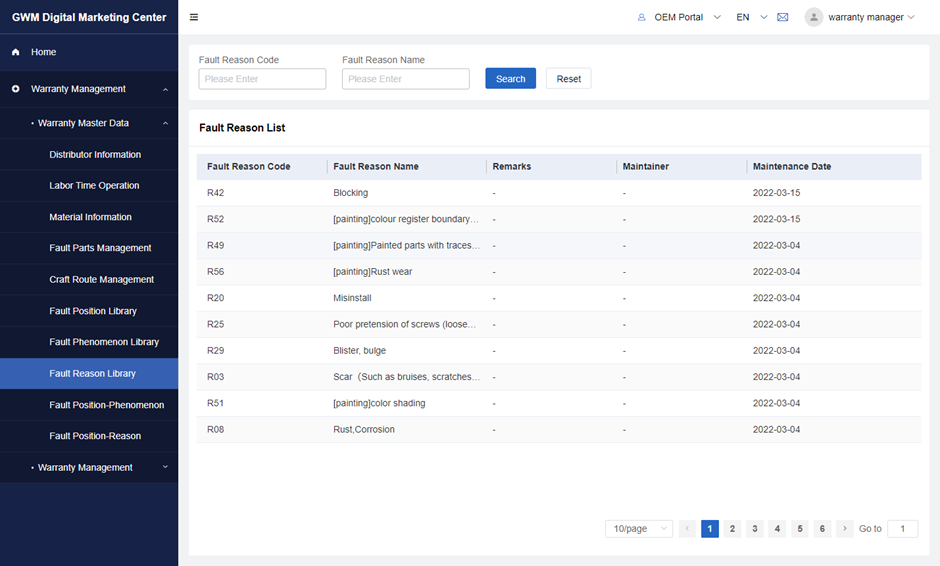
3.8 Fault reason library
1)Note: GDMC specialists can search for eligible fault phenomena based on the fault reason code and the name of the fault reason
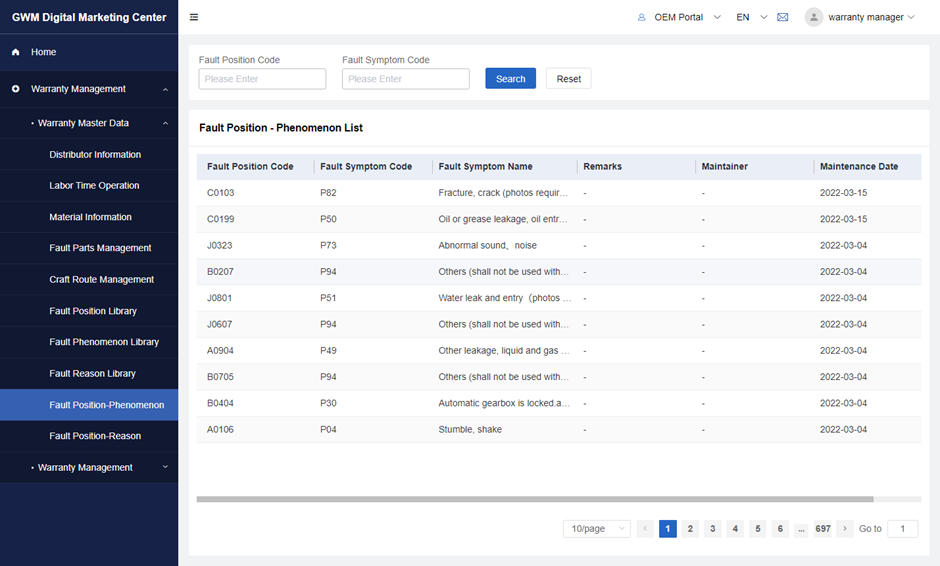
3.9 Fault position-phenomenon library
1)Note: GDMC specialists can search for eligible fault parts and phenomena according to the fault part code and the fault phenomenon code.
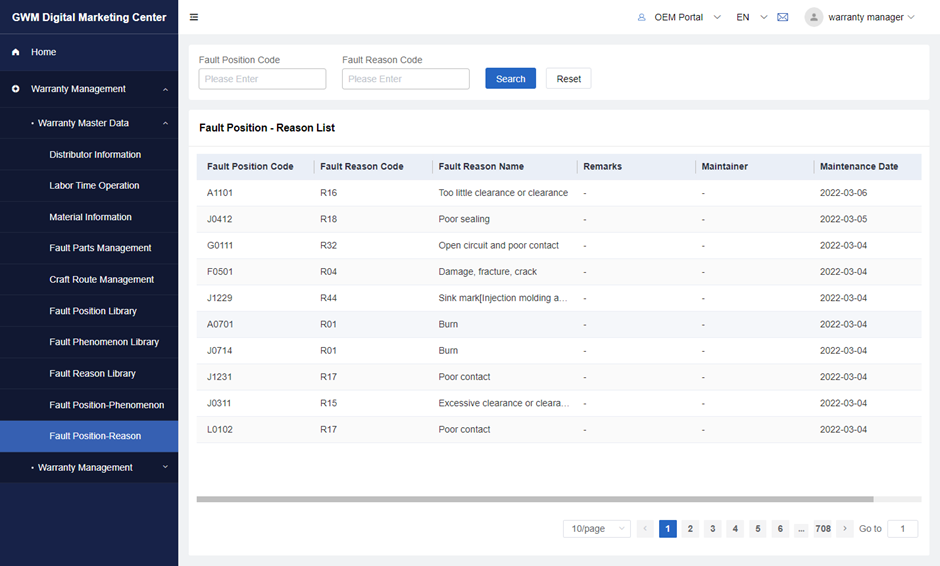
3.10 Fault position-reason library
1)Note: The GDMC specialist can search for the eligible parts and causes according to the fault position code and the fault reason code.
4 Warranty Policy Maintenance
Because now each type of vehicle module has only one policy,so we made a special page to Maintain the Policies.
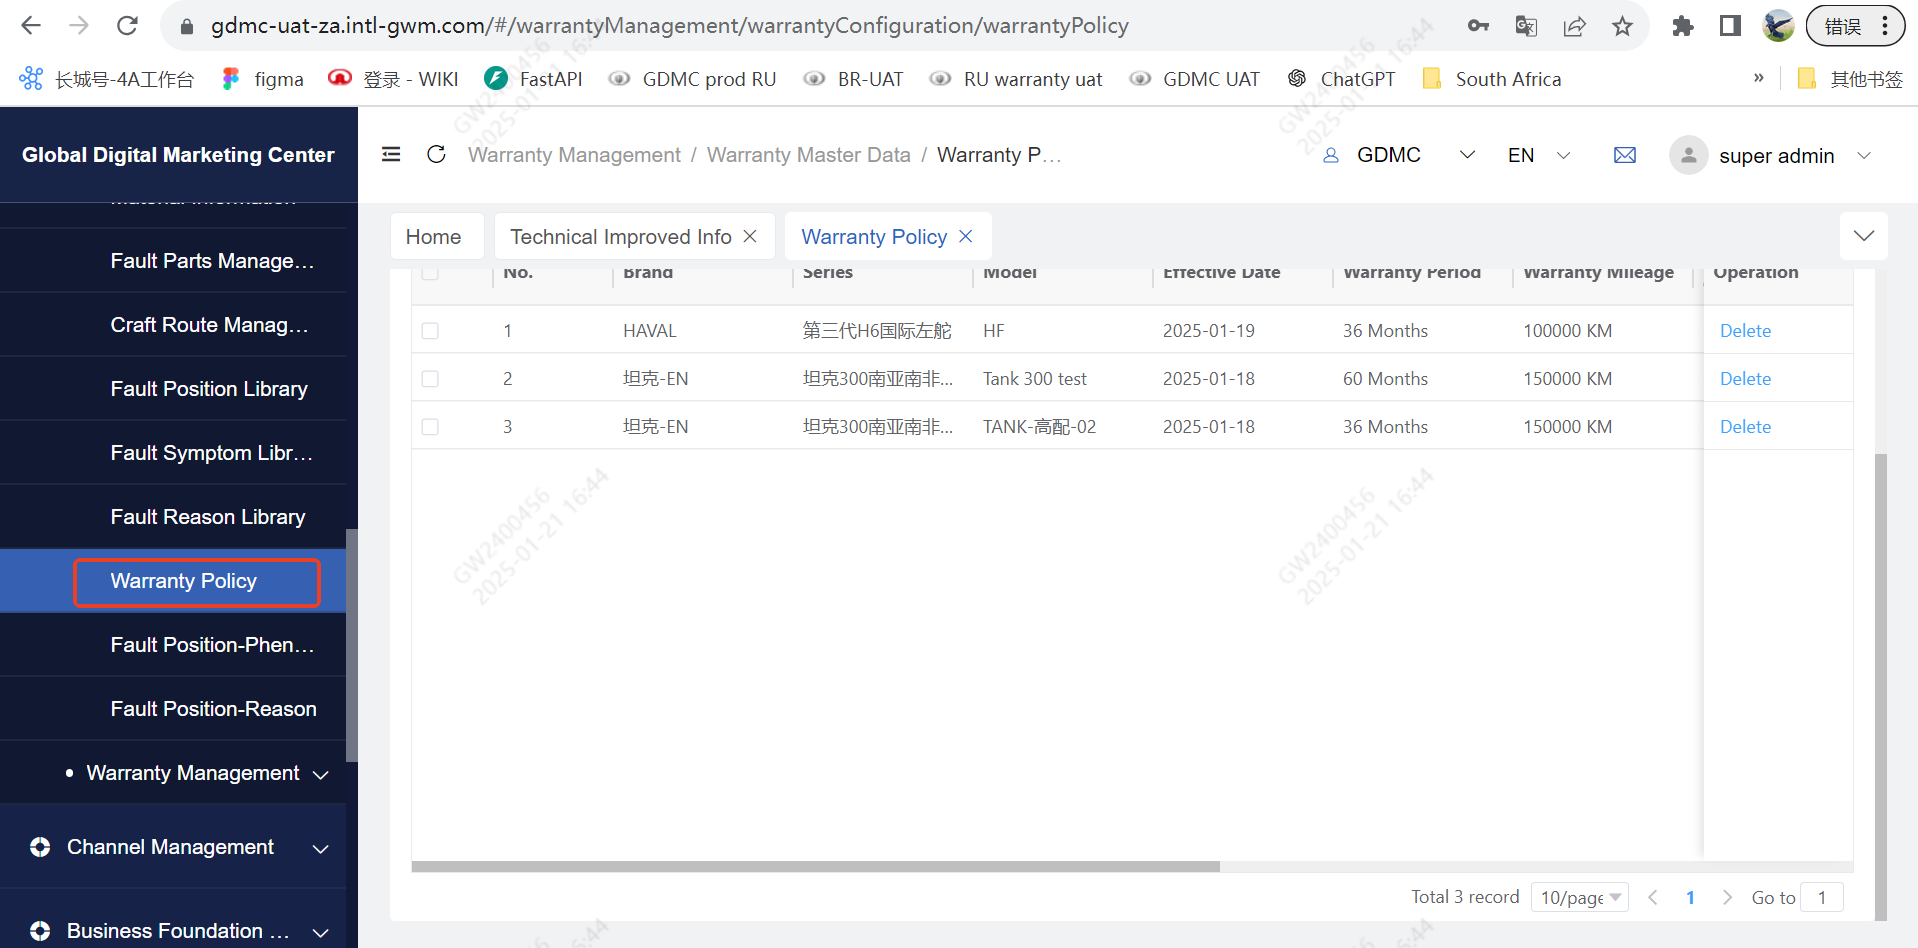
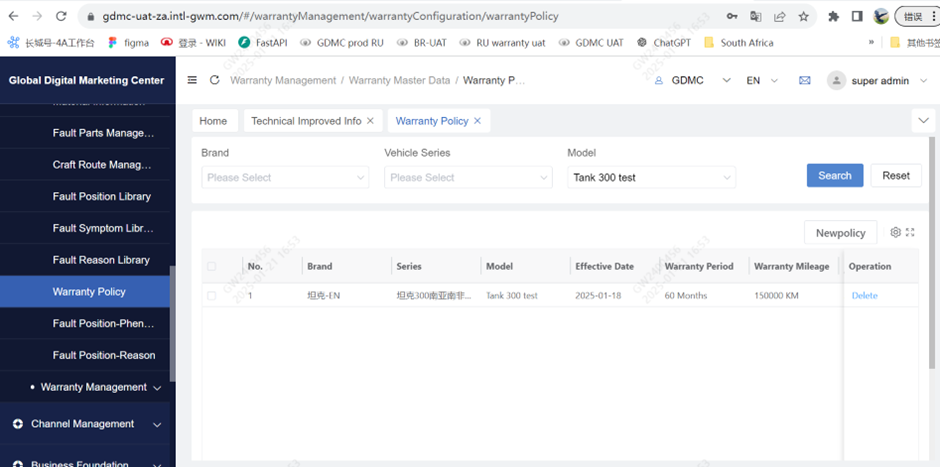
You can search policies by using the filters like brand/series and models which are according with the vehicle master data.
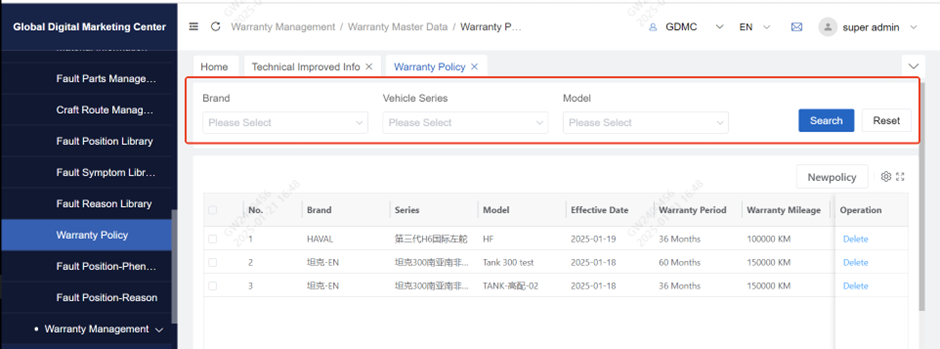
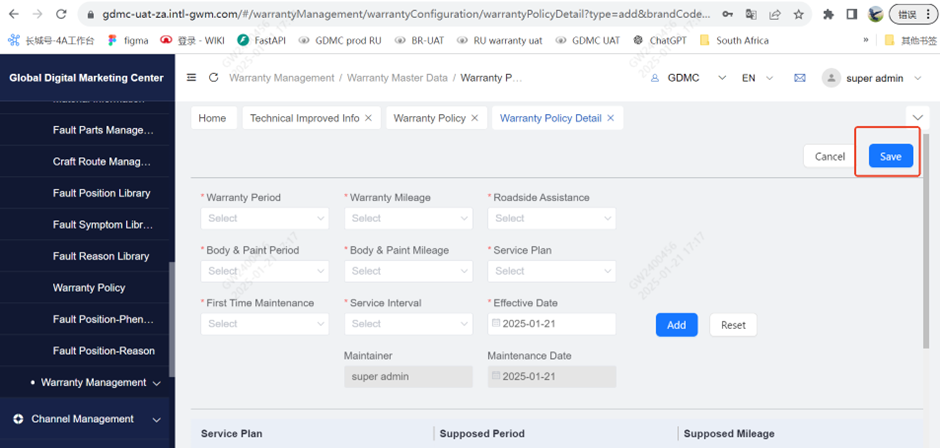
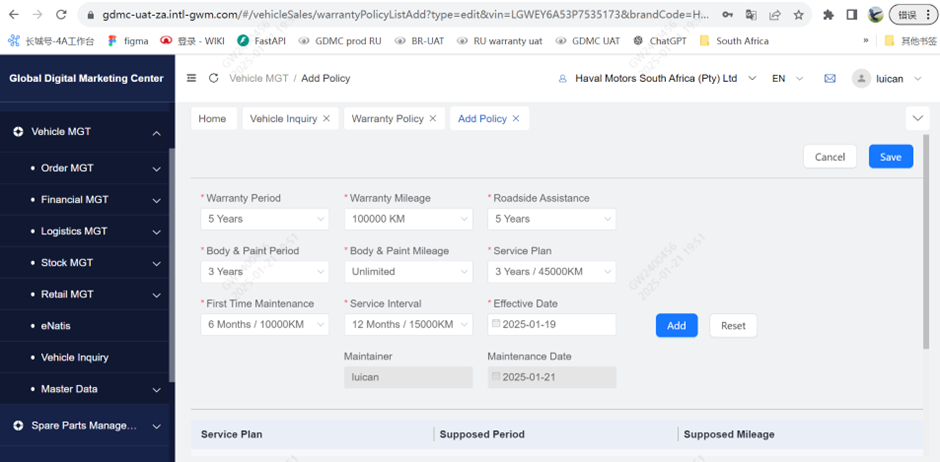
Select a model and click on Newpolicy button to open the maintenance page.

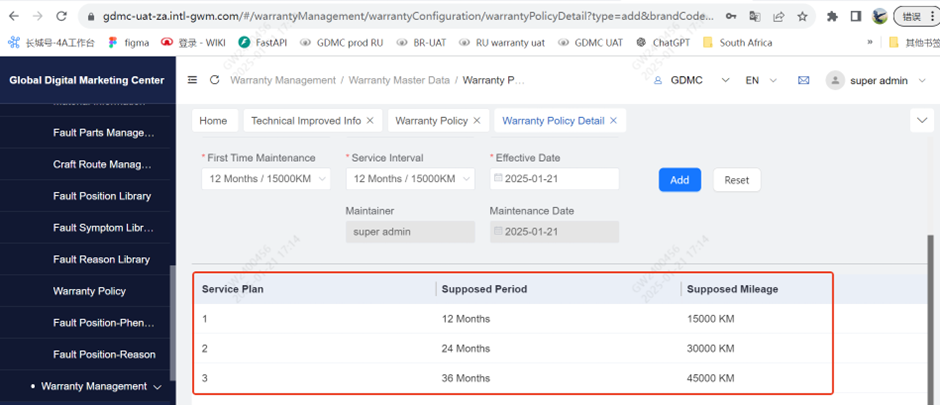
Fill in the model’s policy like warranty period, warranty mileage, Roadside Assistance period, Body& Paint Period, service plan and so on.
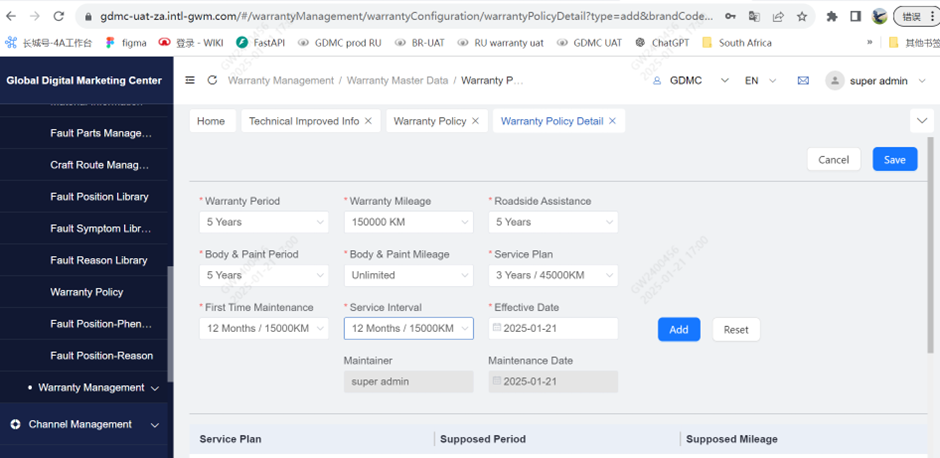
When it regarding to vehicle maintenance, the maintain schedule will be generated automatically.
Then click save to save the policy.
After you set the policy, you can see the policy in each vehicle’s information.
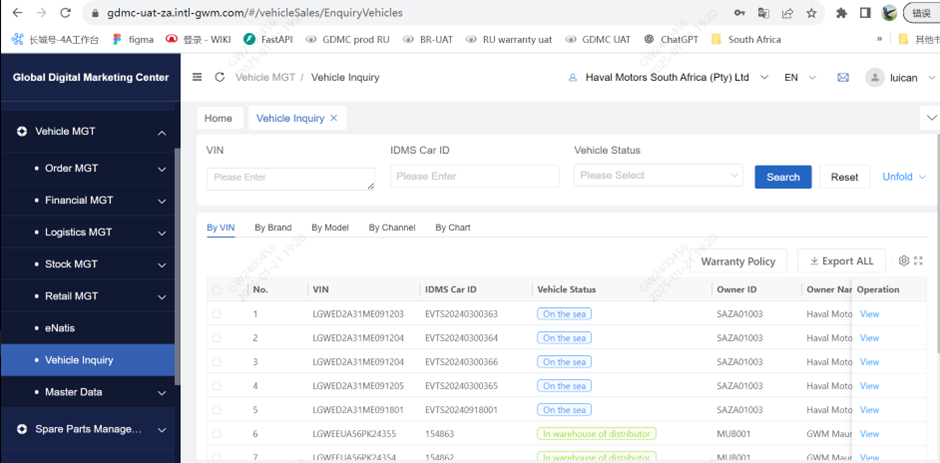
You can click on warranty policy to see policies of each vehicle
You can also search for models or vins here
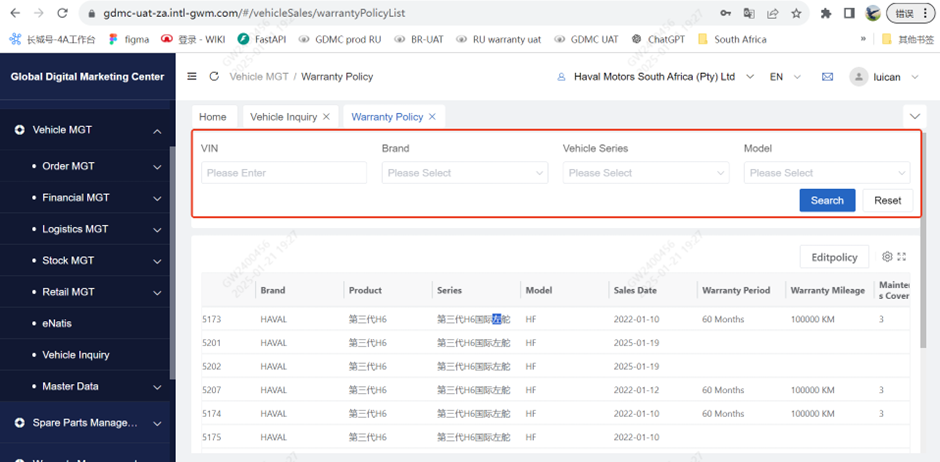
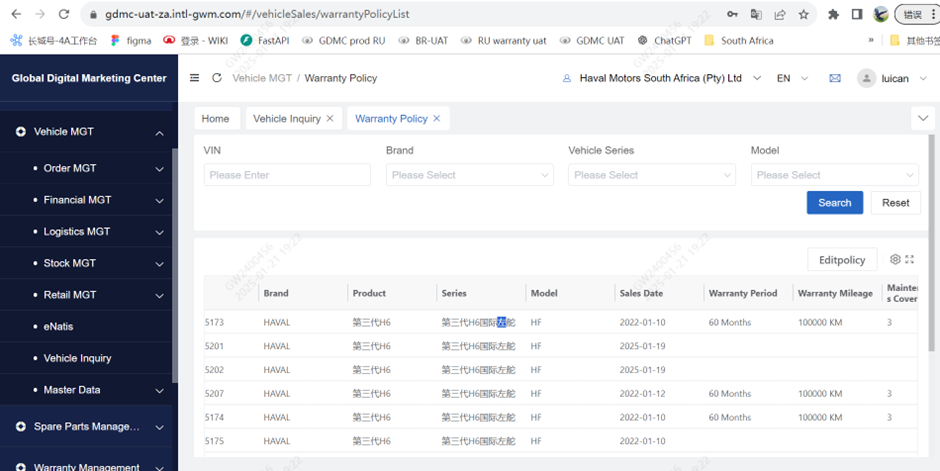
If you have dedicated policy for some certain vehicles, you can search out the vin and modify the policy by clicking on editpolicy button.

You can modify the vehicle’s policy and save it

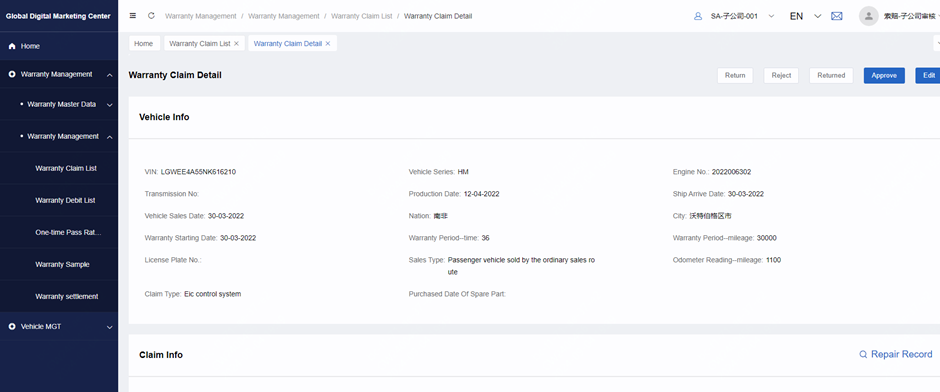
5 Claim Review
Path: GDMC system – Warranty Management – Warranty Claim List
1)Search for the appropriate warranty application form by condition: Claim number, VIN, and Claim Status
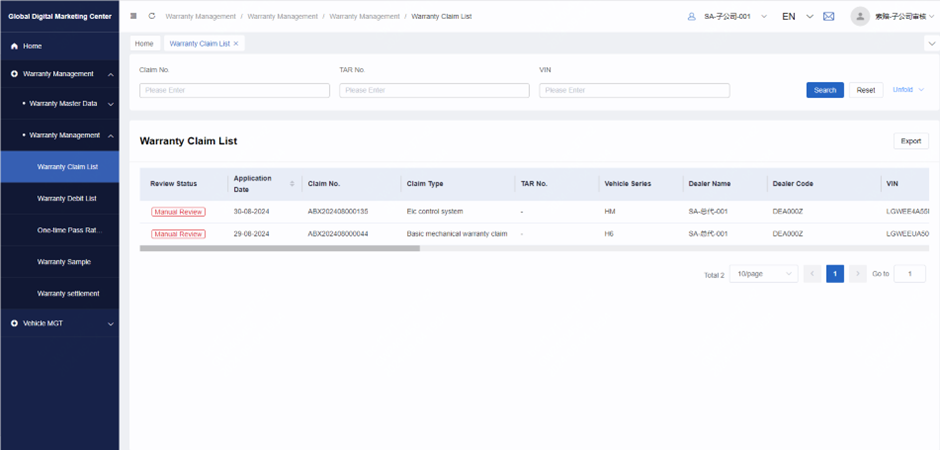
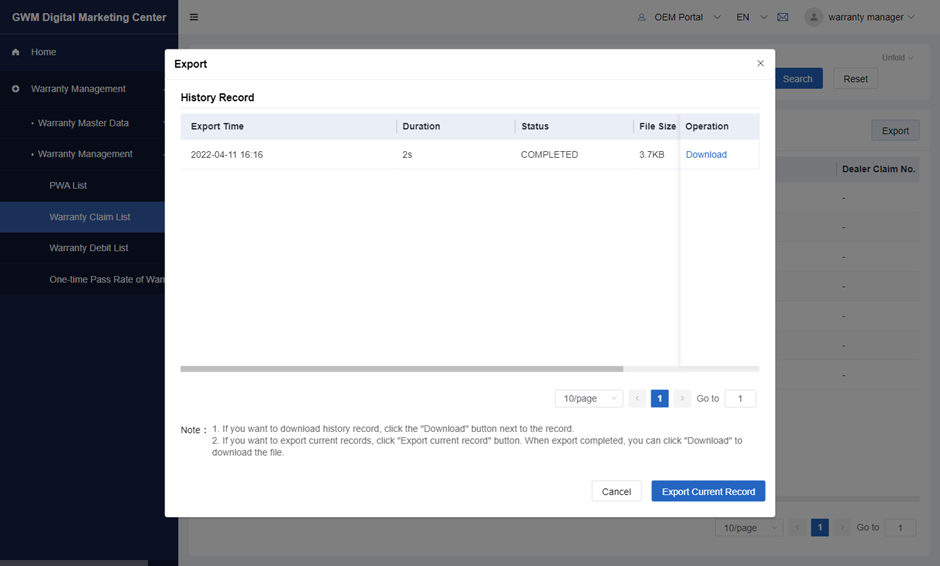
2)The export function is same function as in the warranty application list page.
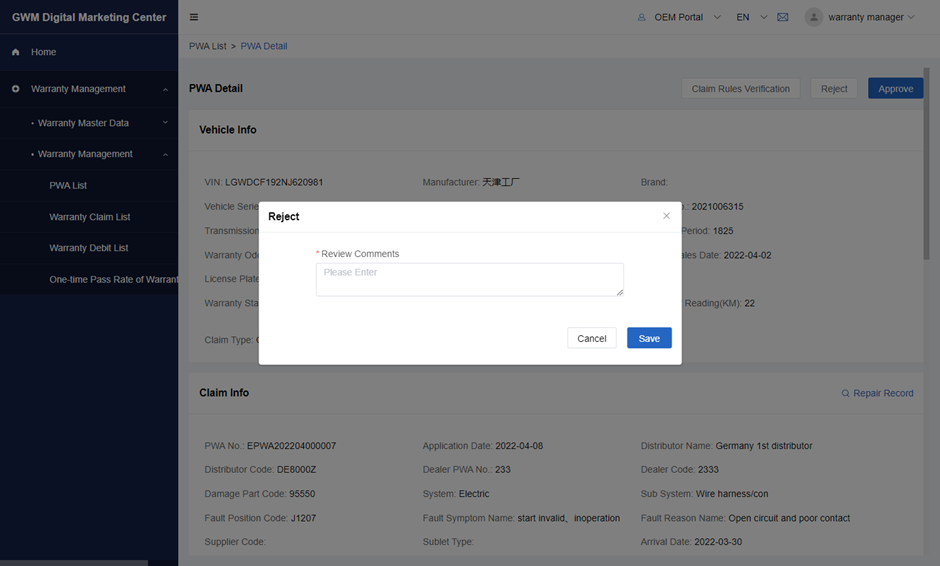
3)After clicking one warranty claim row, users can view the warranty detail page, and decide whether approve or reject this warranty application.
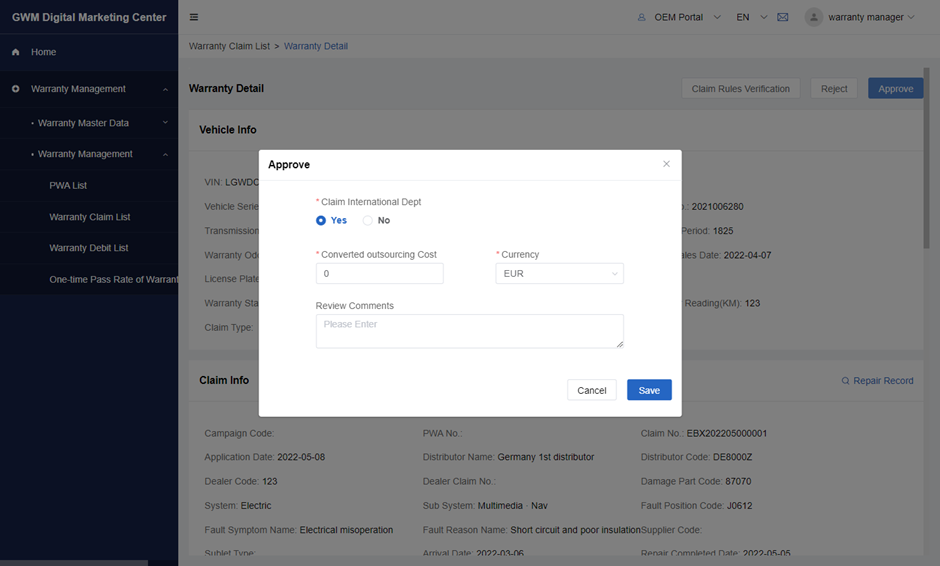
4)If users want to approve this warranty application, click Approve button on the right corner of the page, and enter the required fields. Then click Save button. The status of this warranty claim will be approved status.
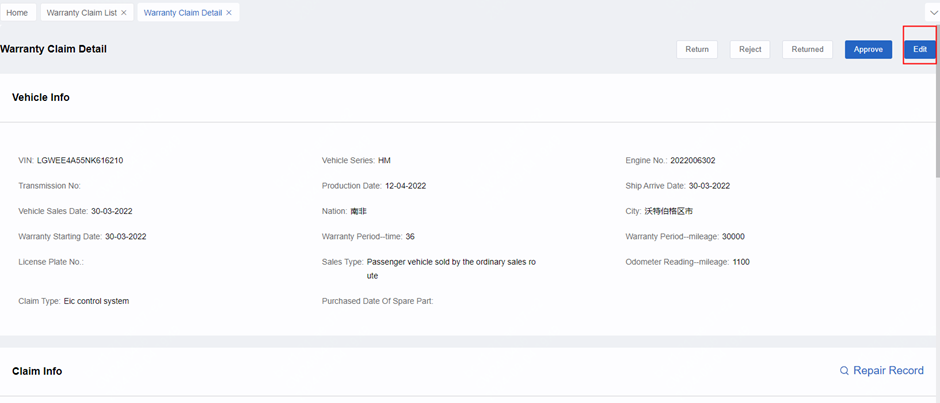
5)If users want to return or reject this warranty application, click Reject button on the right corner of the page, and enter review comments. Then click Save button. If you return dealer’s claim, dealer can see it’s returned and modify it then resubmit it again, if you reject the claim, then dealer cannot modify and resubmit it.

6)if you find there are some little faults in the claim related to claim type/sales type/ odometer reading mileage/arrive date /repair complete date, you can modify it and the system will record the modification.
6 Warranty Settlement
6.1 Description
After claim approved by business owner, it will goes to settlement process. Business owner can see claims in settlement and settled in settlement list.
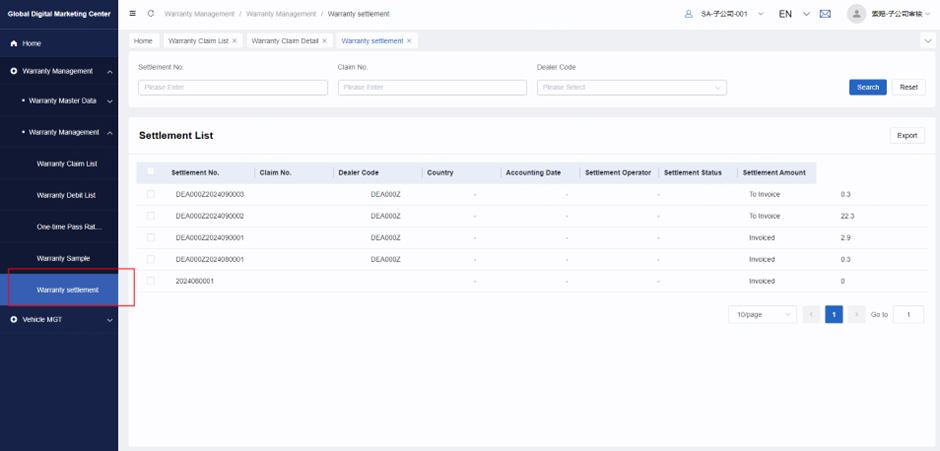
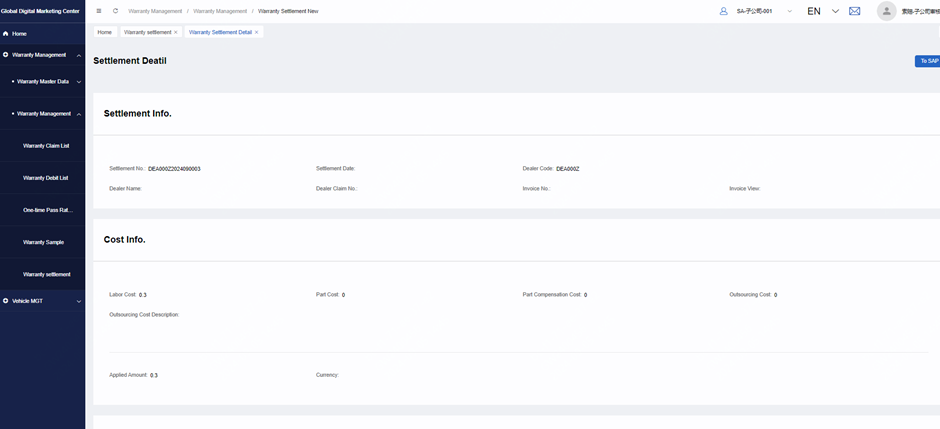
6.2 check and pay
you can enter detailed information of the settlement. After checking it ,if it is no problems, you can click on To SAP ,then this information will be sent to SAP to do accounting.
7 Warranty Audit
7.1 Sample
Path: GDMC system – Warranty Management – Warranty sample
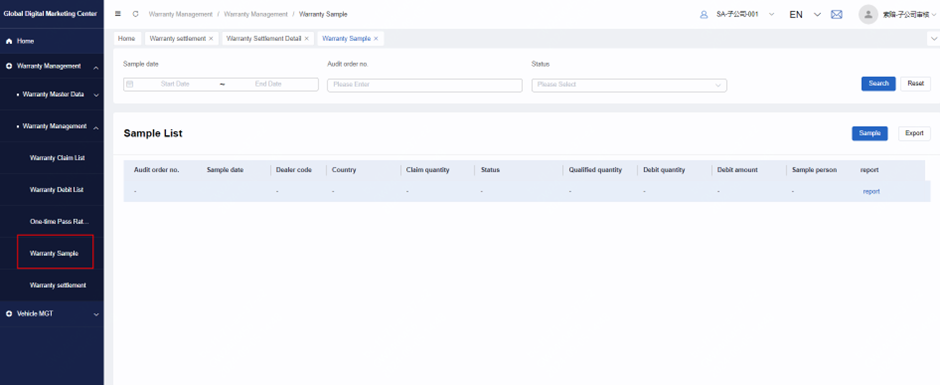
Click on warranty sample to audit approved claims again
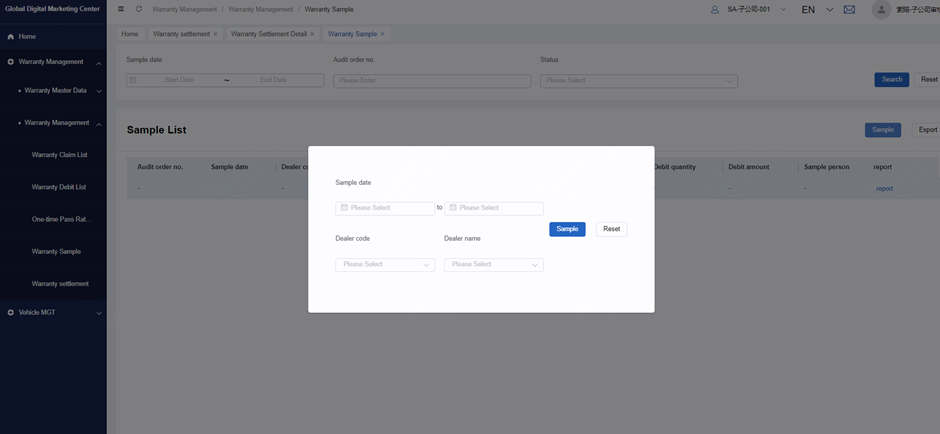
Click on sample button then a small box will popup, then you can input a time zone and the dealer information to make a sample of to audit.
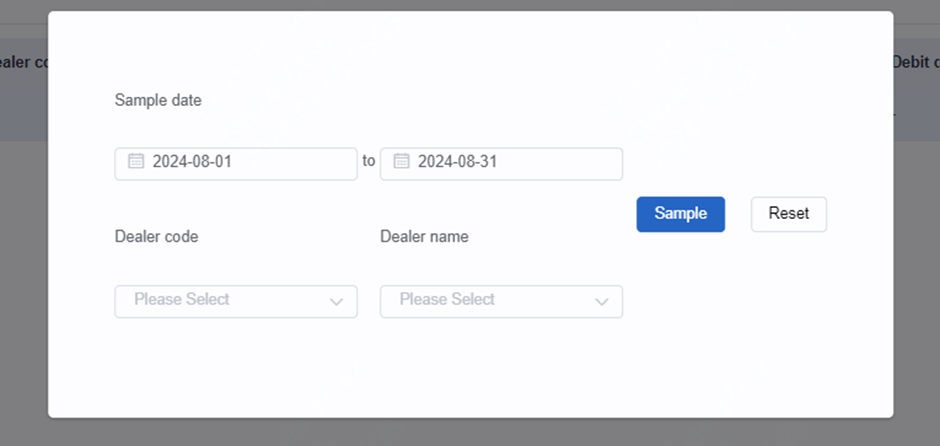
After clicking on sample button, system will generate an audit order includes claims that are approved /invoiced but haven’t been audited.
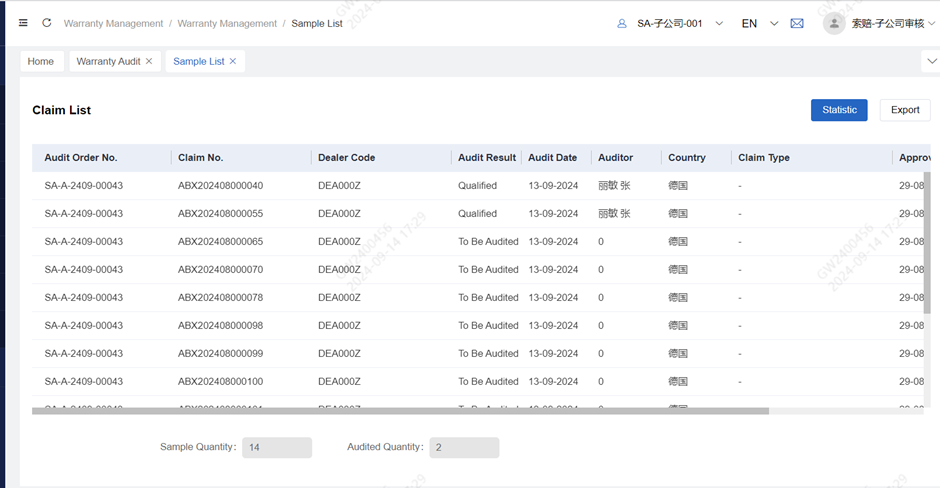
7.2 Audit
enter the audit order, you can see claims in audit process, click one and enter the detailed information
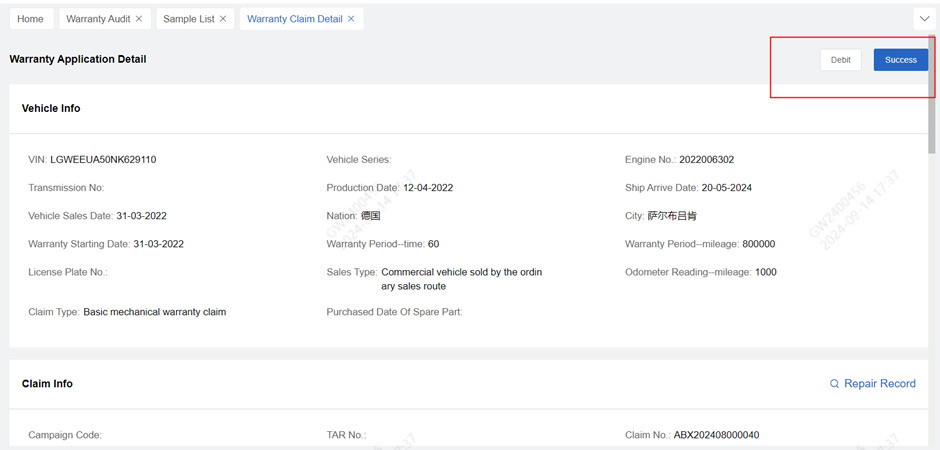
The information is the same as claim detail information page, but the buttons are different.You can check the claim information and decide whether it is qualified, if yes click on success.
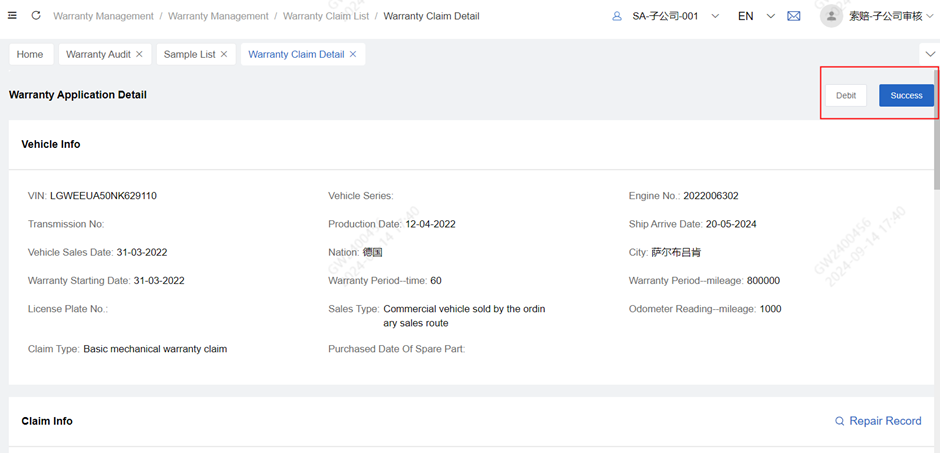
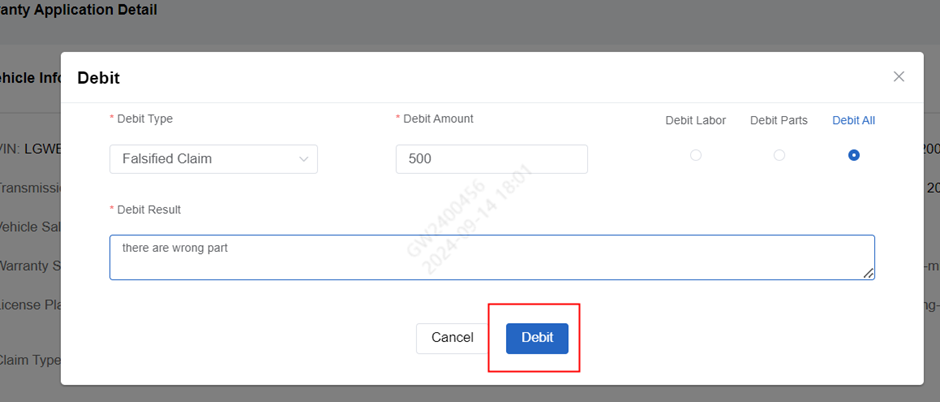
If there something wrong and the user decide to make a debit on the claim, click on debit button
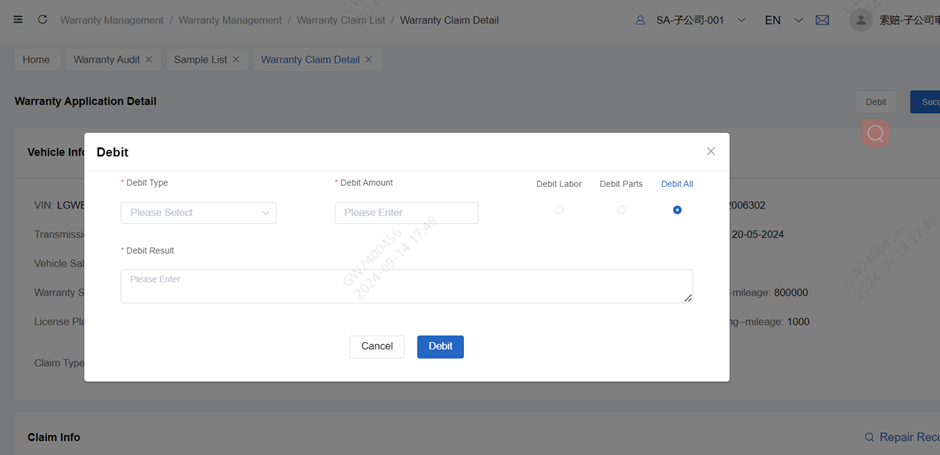
Select a debit type and debit amount/debit reason, click on debit then there will be debit on this claim.
7.3 statistic
After user finished the all the work in an audit order, click on statistic button to see the summary of the this audit order.
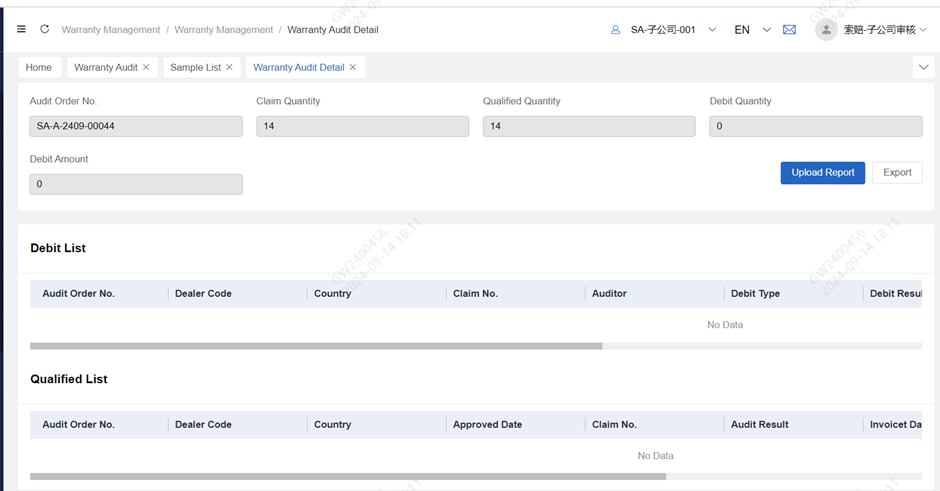
On the top of the page shows the summary of the audit order including how may claims it has/ how many is qualified/how many is debited and the debit amount.
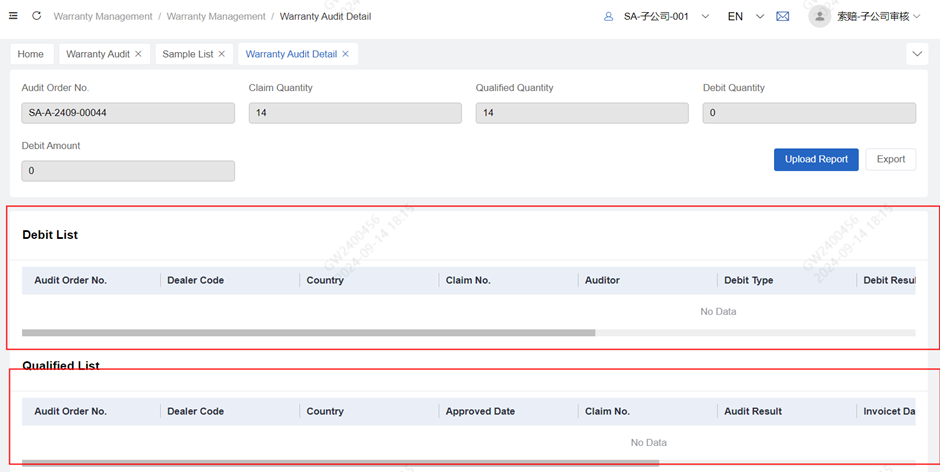
Debited claims will be showed in debit list.
Qualified claims will be showed in qualified list.
8 Report manual – One-time pass rate of warranty claims
Path: GDMC system – Warranty Management – One-time Pass Rate of Warranty Claims
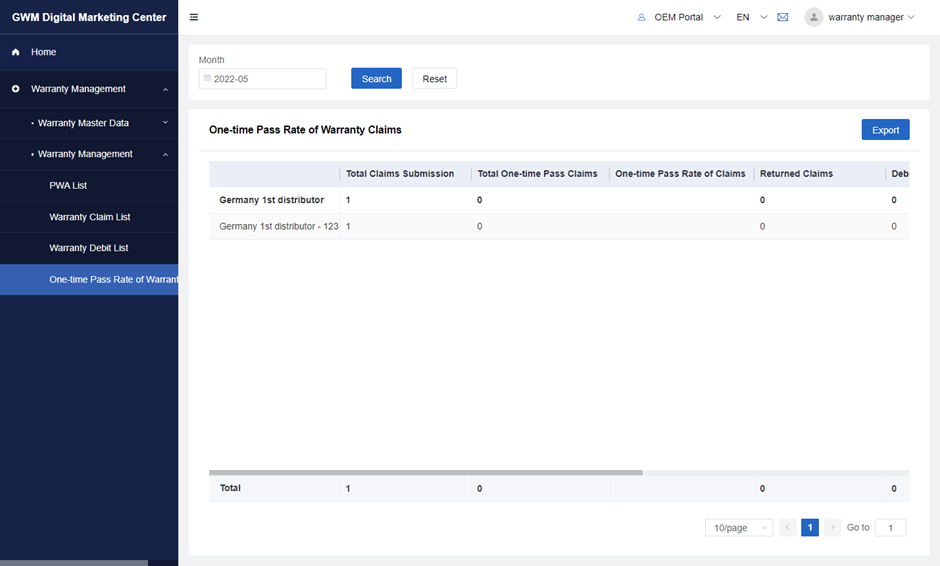
1)The report is filtered by month. Users can select the month to check each month’s report
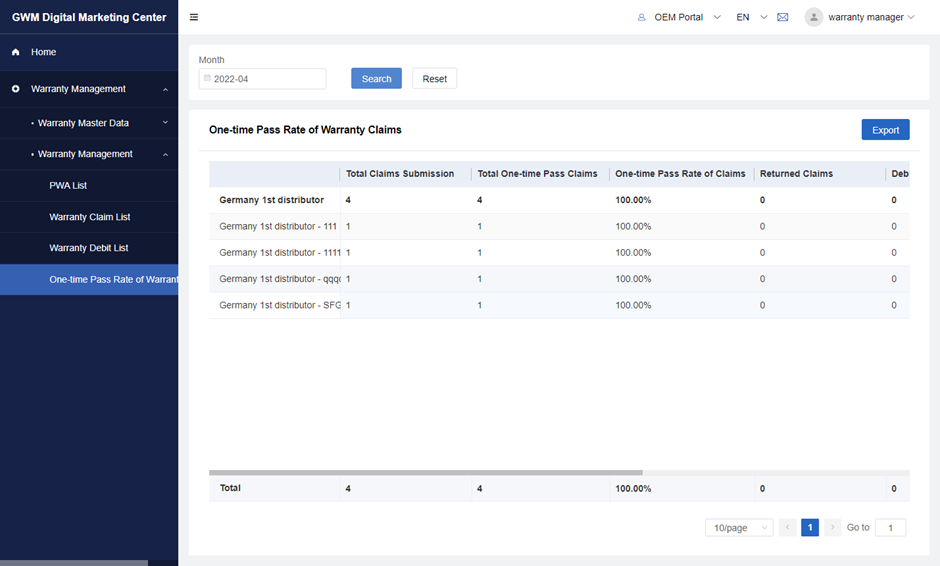
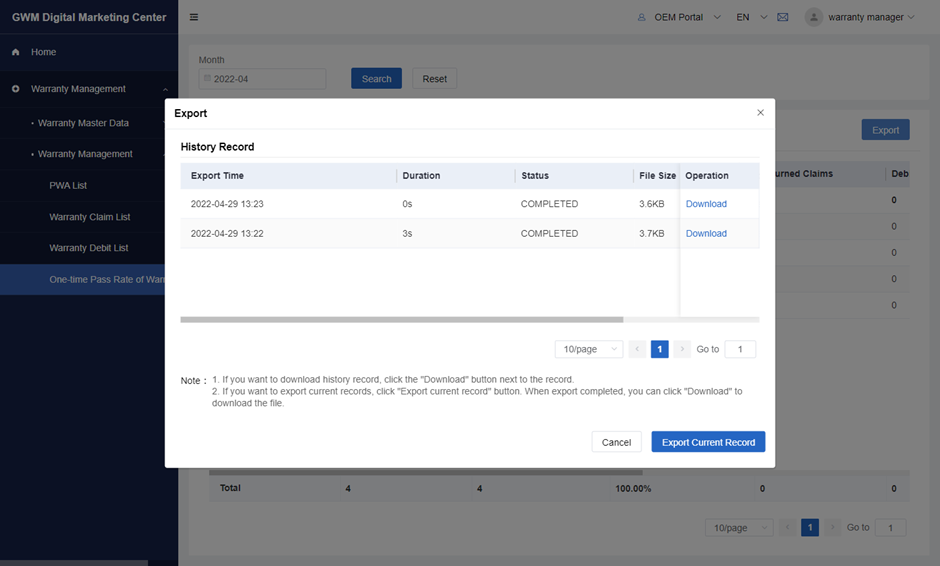
2)The export function is same as in the warranty claims list
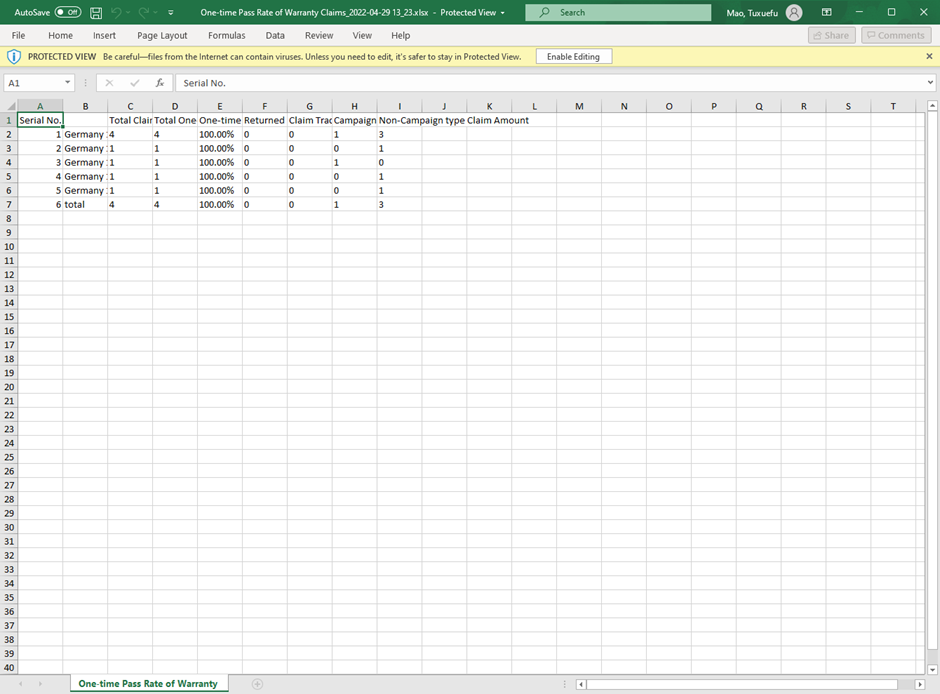
3)Note: The Dealer names and their subordinate dealer code shows here. The total number only count the Dealer’s total, not including the subordinate dealers. The report includes several parameters, and the data is from the internal warranty claims management.